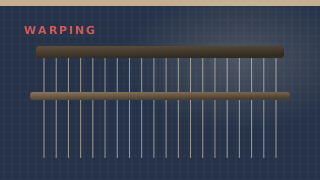
Warping is the longest and least forgiving part of weaving, and the part that determines the quality of everything that follows. A good warp is even in tension, correct in count and clean at the cross. A bad one is a fortnight of broken ends.
Before you start
Work out the total number of ends and the warp length first, and write both on a card. Use the Warp & Weft Calculator so the arithmetic is not the thing that fails.
Step one: measure the warp
The warp is wound as one continuous length in a figure-of-eight around the pegs of a warping board, or directly between the loom and a peg for a rigid-heddle loom. Either way, you are making two things at once: a set of threads of an exact length, and a cross — a small twist near one end that holds the ends in order.
The cross is the whole trick. As long as the cross is intact, no matter how tangled the warp looks, you can recover the order of the ends. Lose the cross and you have a bundle of string.
Set the length
Measure the finished length, add the shrinkage allowance, then add loom waste — 40–60 cm on a small loom, more on a floor loom.
Wind the first end
Take the yarn round the board, forming the cross on the way past the cross pegs. Keep the tension even; a warp wound loose is loose forever.
Count as you wind
Count every end out loud or in groups of ten, and check the count against your card before you tie off.
Tie the cross
Tie the cross first, before anything else. Then tie choke ties every metre along the warp.
Remove from the board
Chain the warp or carry it on lease sticks to the loom.
Step two: thread the heddles
Threading is where the pattern is set. Each warp end goes through the eye of one heddle, and which shaft that heddle belongs to decides what the end does for the whole length of the cloth.
Work in small groups — ten ends at a time — and check the group before moving on. Counting errors compound: an end threaded on the wrong shaft in the first metre is a fault that runs the entire length.
Front to back or back to front?
Threading back to front lets you use the cross directly and is much less error-prone, but you need to reach over the loom. Front to back is easier to reach and suits working alone. Either is fine; be consistent.
Step three: sley the reed
The reed is the comb the warp passes through on its way to the cloth. Drawing each end through a dent sets the spacing. If your sett needs a number that the reed does not divide evenly, sley two ends in some dents and one in others — for example 14 EPI in a 10-dent reed is two ends in four dents and one end in six.
Step four: tie on and tension
Tie the warp to the front apron rod in groups of about an inch, using a knot you can adjust. Then tension the warp and adjust the groups until they are even. The test is your hand: pluck the warp across the width and every group should give the same note.
Take your time here. Ten minutes spent evening the tension saves hours of weaving, and it is the difference between a cloth with an even beat and one with a ridge down the middle.
Watch your eyes
A warp under tension stores energy. When a knot slips or a tie gives way, the end flicks back hard and fast. Keep your face out of the plane of the warp, never cut a tensioned warp, and release the brake before you reach into the shed.
The last check
Before the first pick, look along the warp from the front at eye level. Every end should lie flat and parallel with no end crossing another. Run your hand across the width — it should feel like a single sheet, not a bundle. Then weave ten picks of scrap yarn as a header and check that the shed is opening cleanly and closing completely.
If something is wrong, fix it now. Everything downstream is easier if the warp is right.