Weaving Tools
Warping peg
The single peg you hold the cross on
Lock the brake firstNever cut a tensioned warpMask up for dusty fibreVentilate the dye areaTie back hair · check heddles · ventilate
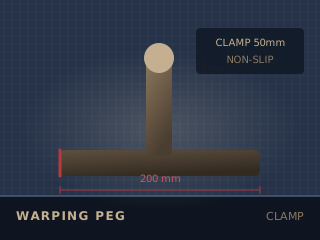
Specifications
| Type | Clamp-on, screw-in, dowel |
|---|---|
| Length | 8 – 15 cm |
| Materials | Hardwood or plastic |
| Clamp opening | Up to 5 cm |
| Quantity | Two or more |
| Grip | Non-slip base |
Technical parameters
| Use | Hold warp end, form cross, direct warping |
|---|---|
| Distance | Warp length plus loom waste |
| Best for | Rigid-heddle direct warping |
| Maintenance | Keep the clamp clean |
| Alternative | Door handle in a pinch |
1Warp4 – 24 dpi
Overview
A warping peg is the small clamp-on peg that holds the end of the warp while you wind, or that forms the cross at one end of a board. On a rigid-heddle loom it is usually clamped to a table at the correct distance to measure a direct warp.
Typical figure for this stage: 8 – 20 N tension. Measure, wind, thread and tension the warp. Most weaving problems are warp problems.
Safety notes
A clamp-on peg can spring off a polished table under load and the warp will recoil. Clamp onto a solid edge, and never stand directly behind a loaded warp when you release tension. Keep the winding path clear.
Using it well
- Measure the distance from loom to peg carefully — that distance is your warp length, minus waste.
- A peg that slips mid-warp costs you an hour. Clamp it to something solid.
- Two pegs let you wind two ends at once with a helper.
- Mark the distance on the floor so you set up the same way every time.
Practise it in 3D
Run this stage as an interactive simulation, with the same figures this page quotes.
Open the simulatorEducational reference. Specifications are typical published ranges for this class of equipment or material, not a specification for any one product. Always follow the manufacturer’s instructions and local rules. Nothing here is a guarantee of cloth, colour or result.