Looms & Frames
Floor loom
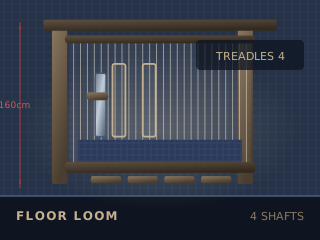
The full-size loom with foot-controlled sheds
Specifications
| Typical weaving width | 60 – 160 cm |
|---|---|
| Shafts (harnesses) | 4 – 16 |
| Treadles | 4 – 10 |
| Folding | Many models fold for storage |
| Assembly | 2 – 6 hours, two people for wide frames |
| Floor space | 1.2 × 1.0 m minimum |
Technical parameters
| Shed mechanism | Treadle, direct or dobby tie-up |
|---|---|
| Warp tension | Screw or ratchet brake |
| Beater | Overhead or underslung |
| Materials | Maple, beech or aluminium |
| Best for | Wide cloth, blankets, rugs, production runs |
Overview
A floor loom ties the shafts to treadles so both hands stay free for the shuttle and beater. It is the fastest way to weave wide cloth, and the loom most home weavers eventually settle on. Frame looms are rated by weaving width, shaft count and the number of treadles — the treadle count caps how many different sheds you can tie up at once.
Typical figure for this stage: 40 – 70 ppi. Open the shed, pass the weft, beat it home. Rhythm and consistent beat make an even cloth.
Safety notes
The beater and the shafts are moving parts under spring tension — keep fingers clear of the reed race while the loom is in motion, and never reach into the shed to clear a tangle without first locking the brake. Loose sleeves, jewellery and long hair can be caught by the beater; tie hair back and remove rings. A floor loom is heavy: build and move it with two people, and never stand on the frame.
Using it well
- Sit at a height where your elbows clear the beater at rest — a stool that is 5 cm wrong will hurt by the second metre.
- Tie up treadles for the pattern you are actually weaving; retying mid-project is where mistakes creep in.
- Check the brake holds tension overnight before you leave a warp on the loom.
- Wax or oil the moving parts, never the warp beam itself.
Works with
Practise it in 3D
Run this stage as an interactive simulation, with the same figures this page quotes.
Open the simulator